
How to create an adorable Elf on the Shelf, Harry Potter theme Christmas letter for your kids!
This post contains affiliate links. That means if you click on any links, sales made through such links will reward me with a small commission – at no extra cost to you. I only promote companies or products I personally use or believe in.
Who has their holiday décor out?? I do I do! I have actually had mine out for about 2 weeks! Yes, yes I am crazy and super nuts about Christmas! With today being Thanksgiving I know a lot of parents are getting their kiddos elf on the shelf ready for the Christmas season. So I am going to show you how to make one of those adorable letters.
Yes, I know I don’t have kids, but that doesn’t mean I can’t have fun with elf on the shelf right? I’m glad you agree! Every year I help my sister with her elf on the shelf return letter, and every year it winds up being out of this world Christmassy! This year I wanted to change things up!

Return Letter 2019 
Return Letter 2018 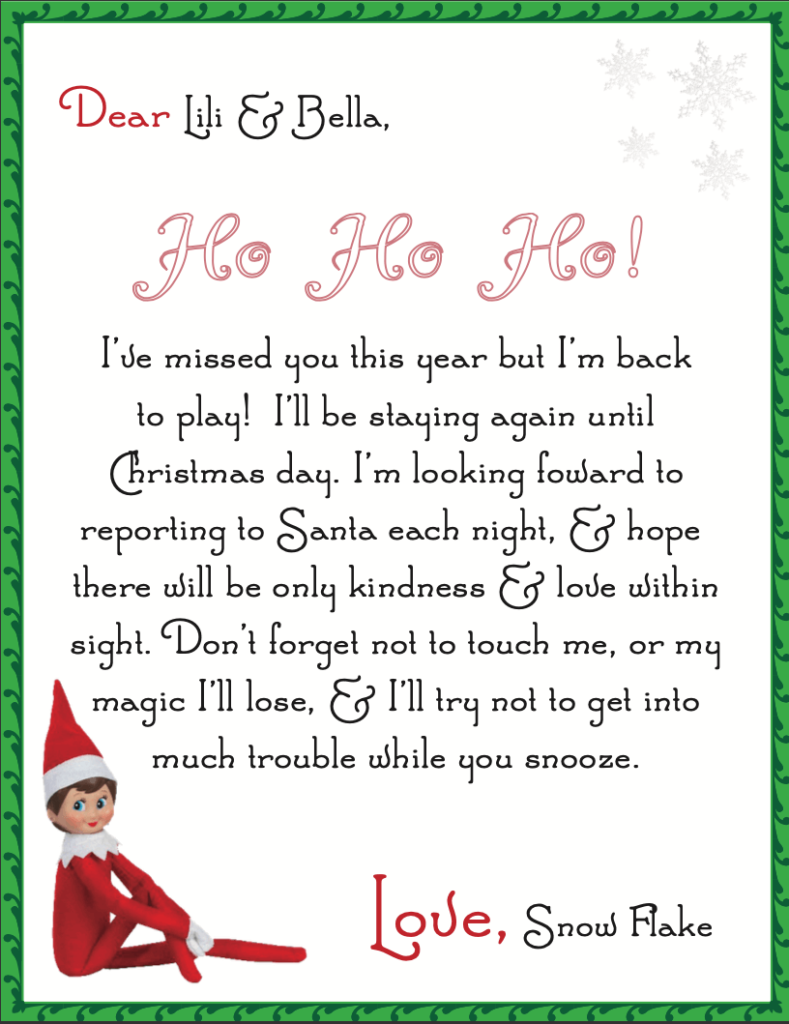
Return Letter 2017
You know how most kids are, every year they have a new obsession. Last year my nieces were over the moon about Descendants and although I didn’t do a Descendants themed elf on the shelf return letter, I probably should have.
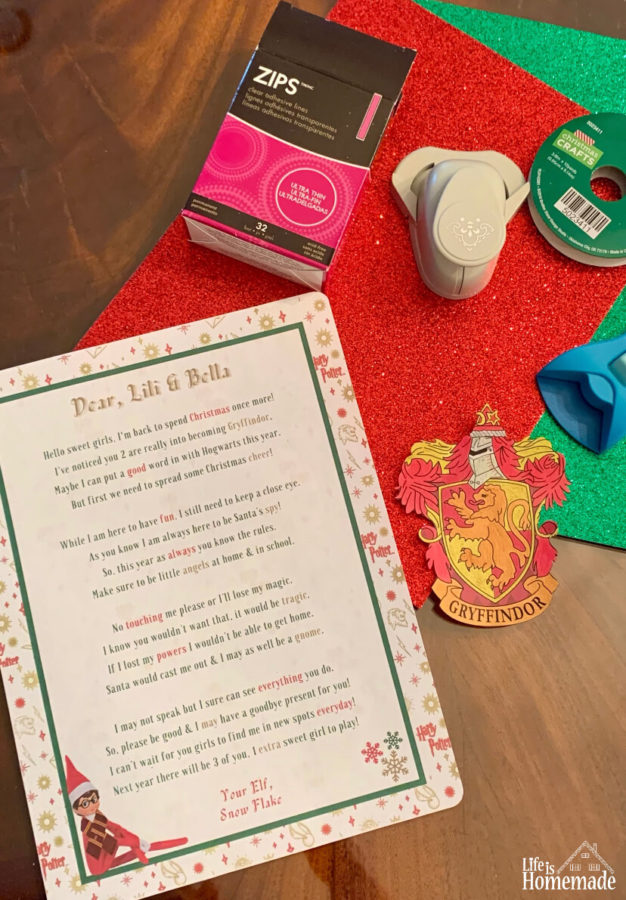
I am sure you have noticed the influx of Harry Potter this year, well it is the 20thanniversary and my nieces are in love! Their birthdays were earlier this month and I bought them matching Harry Potter pajamas, specifically Gryffindor ones. They were so excited they screamed and wore them right away. My older niece Lili loves to keep the elf on the shelf return letters so I always try to top myself each year. I thought with them being into Harry Potter and their favorite house being Gryffindor why not do a Harry Potter theme!
Wait, what is the elf on the shelf?
The elf on the shelf is a cute little elf that hopefully helps your child not only believe in Santa a little more but also teaches them to be good little boys and girls. Basically, if you want your child to be on the nice list instead of the naughty one maybe they will listen to the elf on the shelf.
How it works is you are supposed to bring out your elf every black Friday morning (or whenever you get a chance, before Christmas of course) and sit it somewhere with an elf on the shelf letter (or one you create) the first letter always explains what it is and why it is there. Why is it there? The elf is there to keep your kid in check. Your assigned elf is there to spy on your child and report back to Santa every night on their behavior. Since your elf returns home every evening while your child is asleep you then have to make sure he/she is hidden in a new spot for your kiddos to find in the morning.
Some elf rules, don’t let your kids touch the elf or he/she will lose their magic. This also means don’t let the kids catch you in the act of moving the elf or your kid won’t believe in the elf. They aren’t supposed to be there all year long, make sure you have a goodbye letter ready on December 26th explaining it’s time for their elf to help Santa get ready for the following Christmas (goodbye letter coming soon). If you are still curious about these little guys and girls check out The Elf on the Shelf website for more details.
How to make an elf on the shelf return letter
First, you need to write your letter. You have two choices for the wording, you can google “elf on the shelf return letter” and just copy and paste then add their names and their elf’s name, or write it yourself. I always prefer to write it myself because you can personalize it more. Obviously, I went super personalized this year but if you aren’t trying to do a harry potter theme then you can just copy and paste.
Mine reads

Once you have your letter written or copied you can use Canva or even Microsoft word to create the printout of a portion of the letter. Again I did the harry potter theme and built my entire design off of this. You can do a simple Christmas background or Christmas colors if you aren’t doing Harry Potter.
The easiest way to do a letter is to print it on 8.5×11 printer paper but you want to make sure you leave enough outer edge so you can cut enough of the edge off and paste the letter onto 8.5×11 cardstock. The way you can do this is to have a simple background which you can find on Google or Microsoft Word, stock photos depending on your theme or you can just do solid colors. If you are handy with Canva I highly recommend using that for this part. Word is a little different so I use Canva or other design software.
Here is how you can make a cute border on word, I would use a background from google and then insert it into a word document. Next, you will want to right-click on it and make sure you select “wrap” then select “text behind”, this will let you have the image behind the text. Then, you will want to scratch the image to cover the entire page so at this point it is movable for you to have it cover all of the white. After you have done this you can go back to the insert option and add a shape. I use the rectangle then you can make it white and add a border of color if you want. I like to use Canva for this part because then you have an option to make the white part a little transparent so you can still see the image a bit.
When you have your background ready you can now add your text. Copy and paste your text into the white box and choose your favorite Christmas fonts! If you want to add an elf you can get one from google and insert it just as you inserted the first photo into word. I also found snowflakes and added those to the corner. If you are wondering about the Snowflake elf and how she has harry potter attire I added that myself using design software but if you want her I have left her below.

Setting your elf on the shelf letter on cardstock.
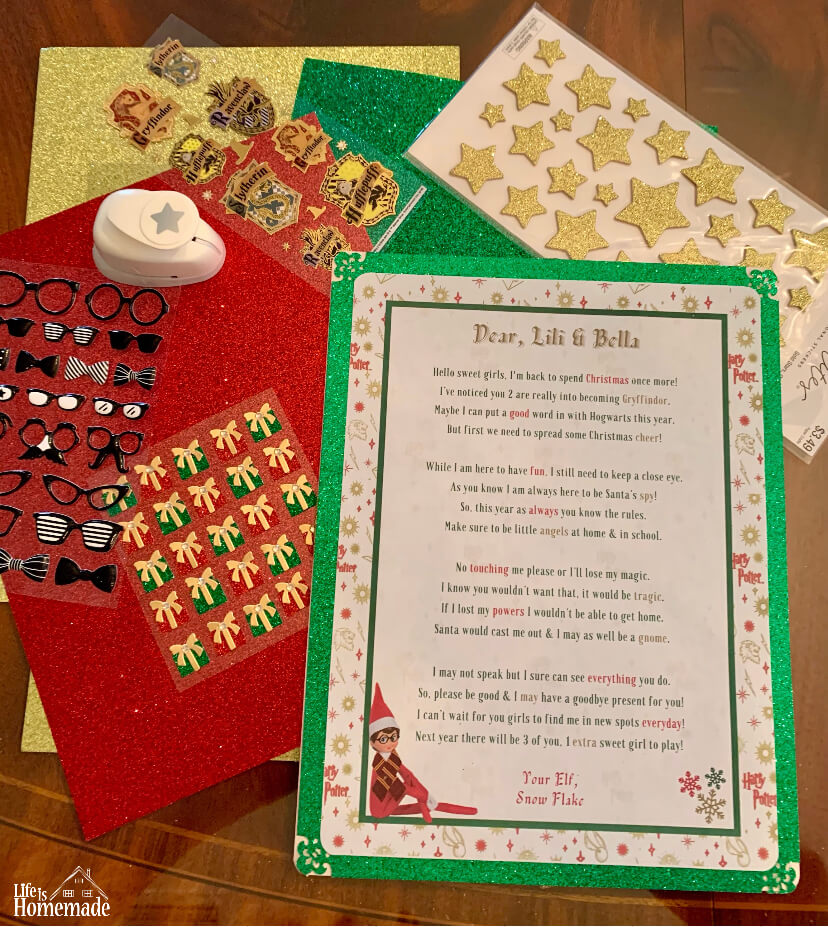
Do you have your printout ready? Great now grab some pretty Christmas cardstock and a paper cutter and let’s get it set so we can start decorating!
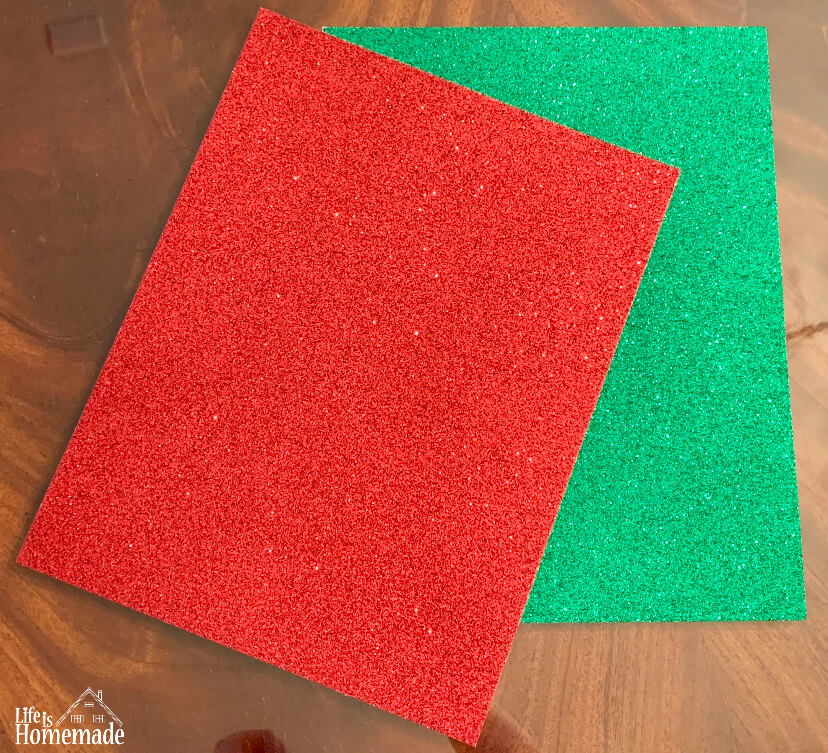
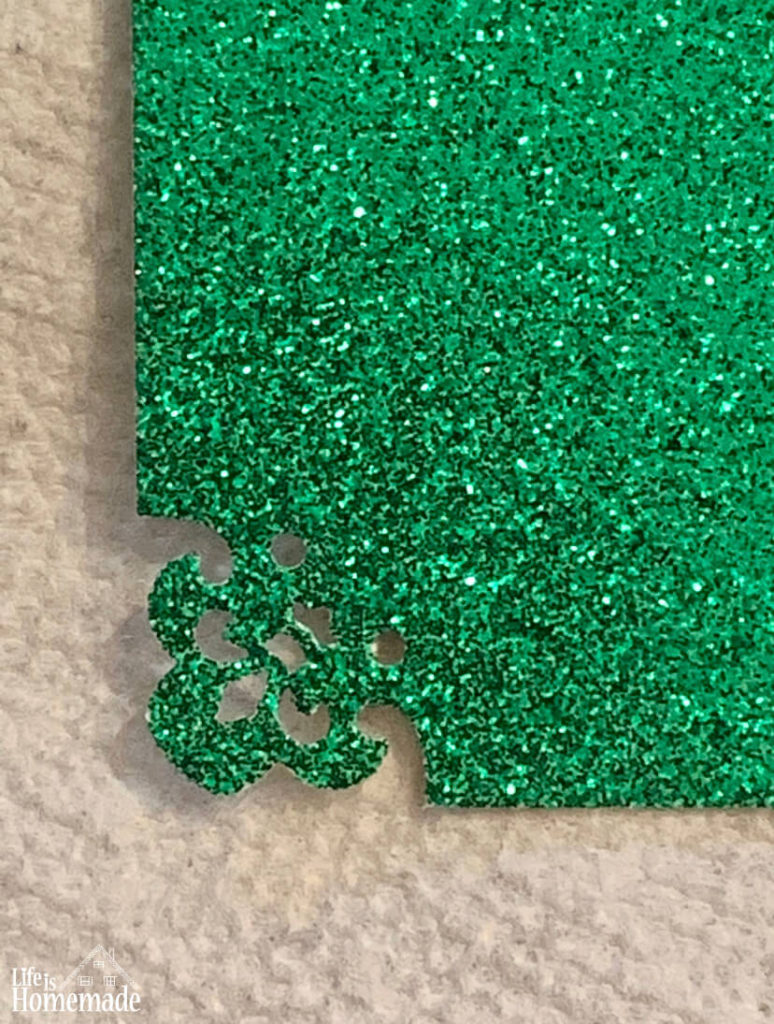
For this Christmas letter, I used two pieces of 8.5×11 glittery cardstock from recollections, one green for the front and one red for the back. I chose red for the back to really emphasize Gryffindor.
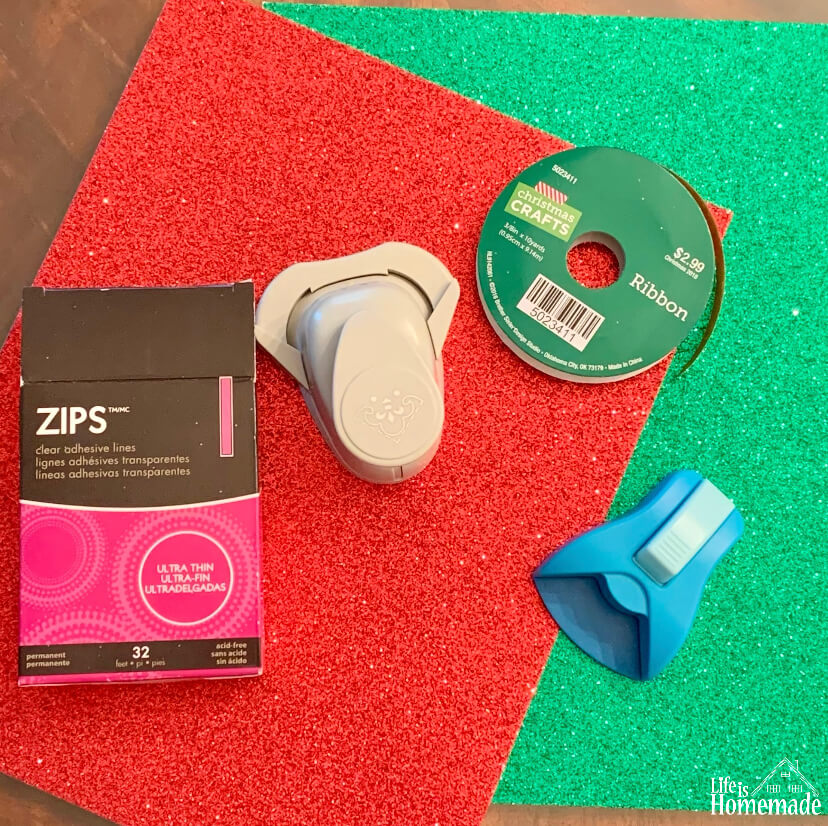
For the front, before you do anything using a paper cutter, cut enough of the edges off of your letter so there is a little bit of the border/background you created still showing but enough cut off so you can decorate what’s showing from the cardstock. I cut off about 3/8 of an inch around all sides. Prior to gluing/zipping my letter to the cardstock I also used a corner punch on the letter, I prefer the rounded corners but you can leave them alone.
Next, choose what color cardstock you want to use and you can either use clear glue or zips/zots to adhere the letter to the green cardstock. If you have any fun corner punches you can punch the corners of the cardstock if not no worries you can decorate them! The back needs a little decorating before we adhere it to the front piece so let’s get to that.


How to decorate an elf on the shelf return letter for a harry potter theme.
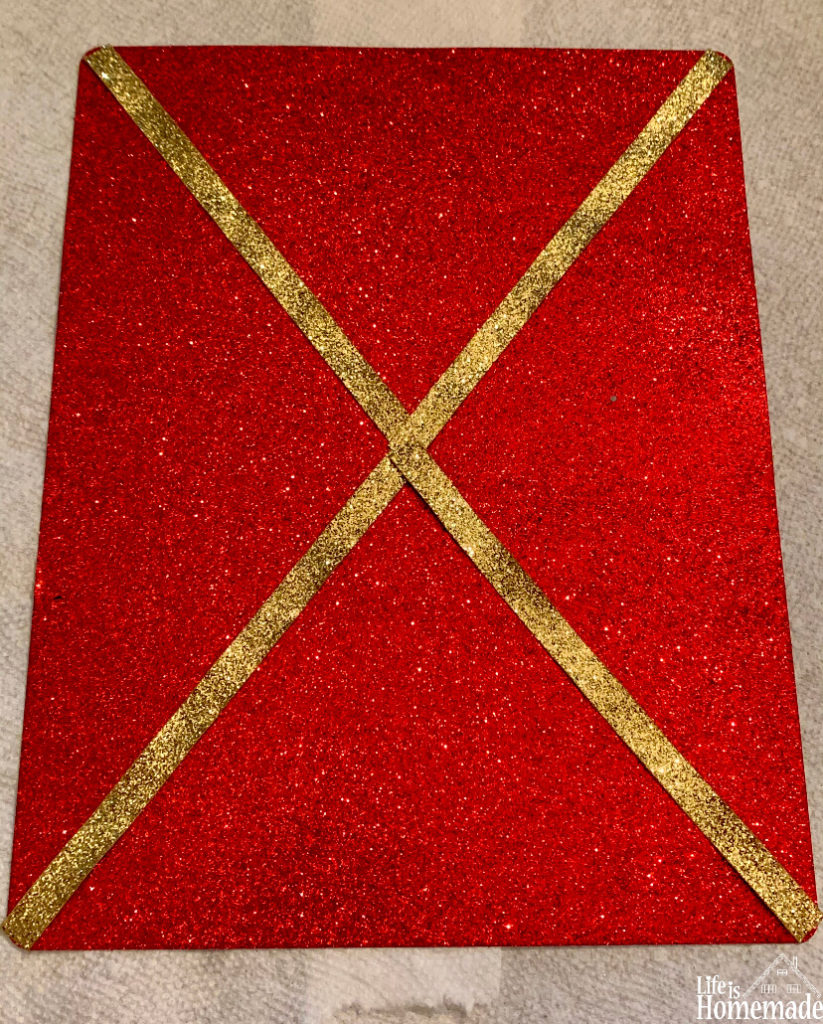
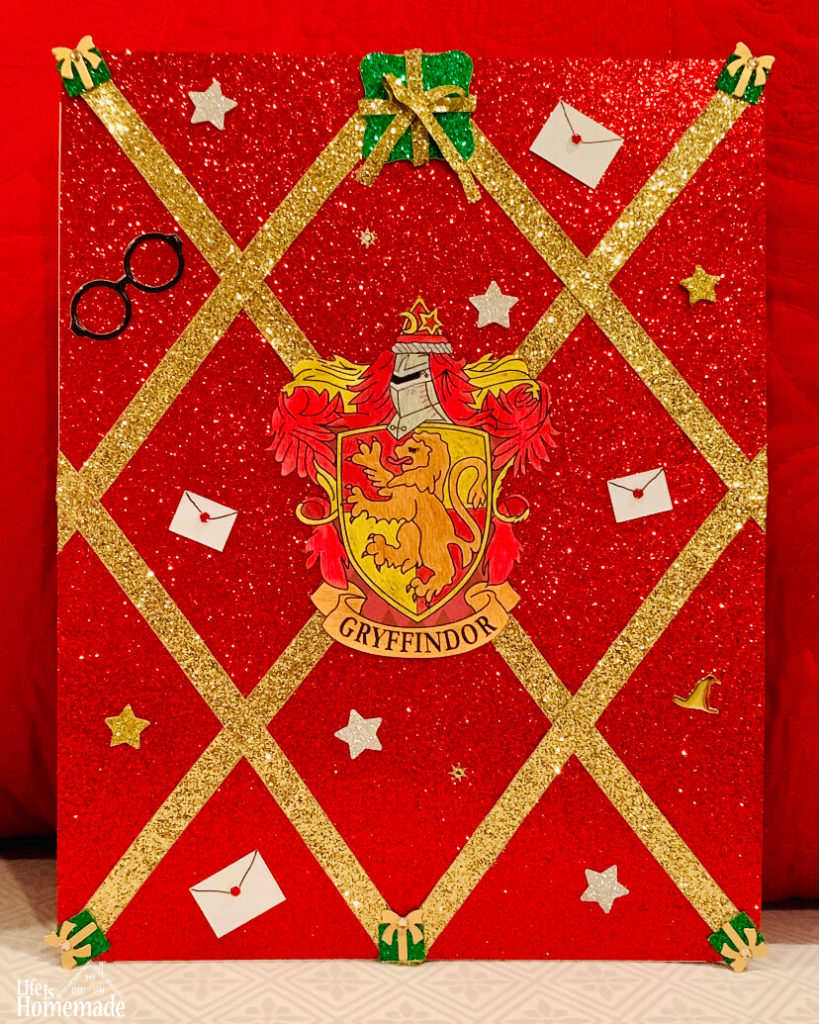
I started getting my idea ready for the back before decorating the front. The back has a lot more space so I wanted to make sure I put more attention there. For Gryffindor I wanted to sort of mimic an argyle pattern, I did this by using a gold ribbon that I had. The ribbon is about 3/8 inches thick and I cut eight 8 inch strips, you could also do two 13.75 inch strips for the two from corner to corner diagonally and then four 8 inch strips for the others. I at first had the thought of making it look like the lines from the scarf but immediately scratched that idea once I looked at it so that’s why I did eight 8 inch strips originally. Before adhering to the strips I used the corner punch to make rounded corners then laid the gold strips and made sure I laid them out the way I wanted them to look. Once I was happy with the gold strips I adhered them using zips. There may be overhang from the gold ribbon, that’s okay on the tops and side, you can hide that between the two pieces of cardstock for a more finished look by adding more glue or z-dots to the backside of the cardstock. For the corners, I would cut it as close as you can to the side of the corner. I decorated my corners so it is okay if it isn’t perfect.


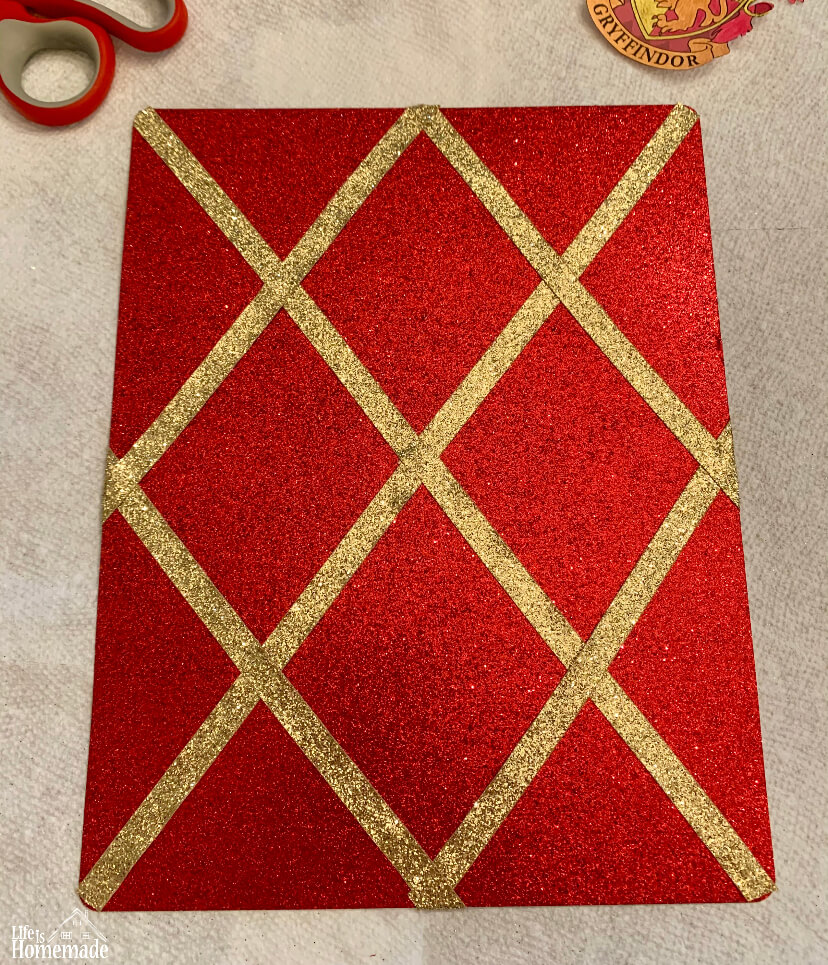
For the Gryffindor crest, I went on google and found an image I liked then enlarged it and printed it out. I cut it out as best as I could and then I used zots to adhere it to the cardstock.
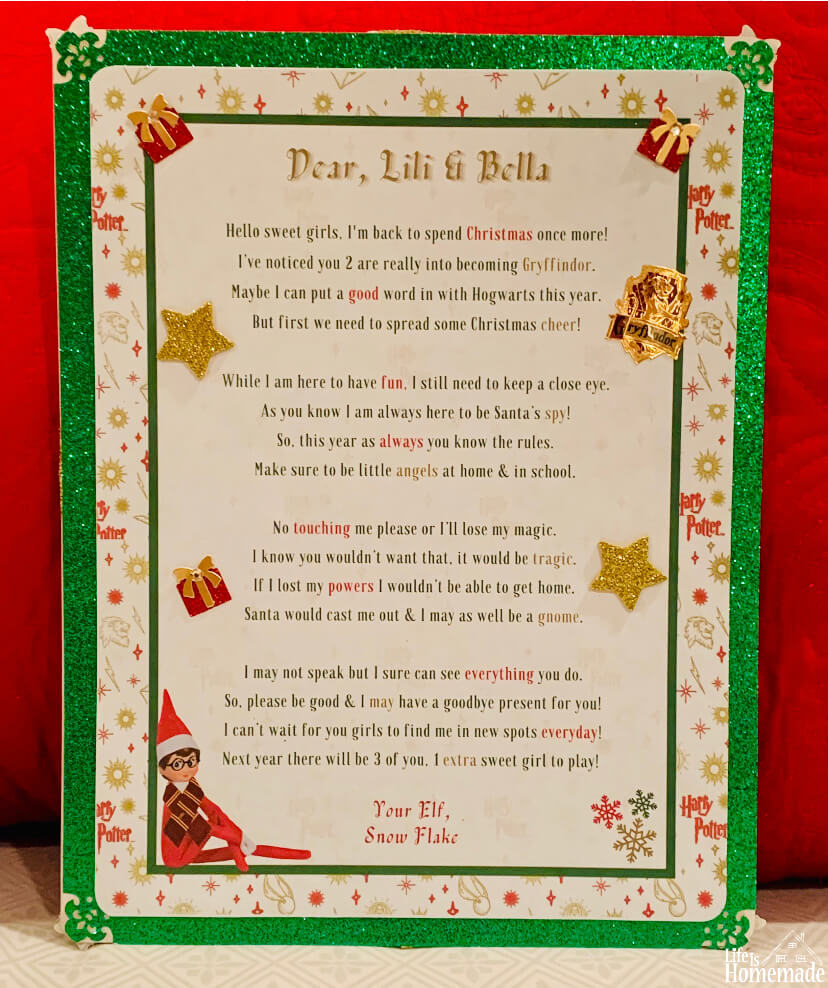
You can now put the front and the back together by places zips or glue onto the back of one of the cardstock pieces. Make sure you have them facing the right way and then add the other piece backside down onto the first one. Make sure it’s as even as you can get it. Now the fun part! I purchased some Harry Potter stickers and also printed other things out in order to make it as harry potter themed as I wanted. As you can see I added some Christmas things too but you can make it as Harry Potter or Christmas as you want.


Next, I added the green gifts to the corners and added some gold stars. I then moved to the glasses and harry potter stickers and added what I wanted where I thought it looked good. The gift at the top was made by using a bracket square punch and then I cut one of the ribbon strips in half to create a bow. I added that to the top and another small gift sticker to the bottom. I continued to embellish the back with silver stars that I made using silver glitter paper and a star punch. I then grabbed white cardstock and cut rectangles out to make them look like the Hogwarts acceptance envelope. I did this by drawing the lines from the top corners and then using a very small round hole punch to create red dots using the red glitter cardstock.


Once I was happy with the back of the letter I moved to the front adding other items I had used in the back. I figured since I had so much green in the front I would add the red gifts instead of the green ones. I added a small Gryffindor crest sticker to the front. I then added some gold stars and viola, Harry Potter Themed elf on the shelf return letter is done!
I hope this post has inspired you to do your own elf on the shelf return letter! Happy Thanksgiving!

Hey there! I’m the owner & author of Life Is Homemade (the blog), as well as Mad About Madeleines. I hope you enjoyed some of the delicious recipes, how-to’s, DIYs, & product reviews I blogged about. Thank you for your previous support I hope you stick around on my new journey with Mad About Madeleines.
Such a great idea! My nephews are hug Harry Potter fans and they would absolutely love this. Thanks for sharing.
My pleasure! I enjoy making these, I know how much my nieces love it so I thought why not share it!